Spring Boot RESTful CRUD Example with MySQL Database
This guide will help you to build Spring Boot RESTful CRUD Example with MySQL Database. As we know, making REST service in Spring Boot application is super easy and fast. Spring Boot data provides CrudRepository interface for generic CRUD operation in org.springframework.data.repository package.
To create a connection with the MySQL database, we need to configure data source properties in the application.properties file starting with spring.datasource.*. Spring boot uses spring-boot-starter-data-jpa to configure spring Java Persistence API (JPA).
What we’ll build
In this example, we will create a Spring Boot application that connects with our external MySQL database, consume and produce the JSON data and performs the following operations:
- Save the user submitted data into the database.
- Fetch all user submitted data from the database
- Fetch particular data from the database by a given ID.
- Update existing data.
- And delete a record from the database.
1. CrudRepository Interface
CrudRepository is an interface which provided by Spring Framework itself. CrudRepository extends Spring Data Repository which is a central repository marker interface. CrudRepository provides the generic method for create, read, update, and delete (CRUD) operation.
CrudRepository contains total 11 methods for CRUD operation, some of them are listed below that we will use in this application:
<S extends T> S save(S entity): Save and update a given entity. Entity can not be null and the saved entity will never be null.
Iterable<T> findAll(): Returns all entities.
Optional<T> findById(ID id): Retrieves an entity by its ID. ID cannot be null.
void deleteById(ID id): Deletes the entity with the given ID. ID cannot be null.
2. Technologies Used
Find the list of all technologies used in this application.
- Spring Tool Suite 4
- JDK 8
- Maven 3
- Spring-boot 2.1.2.RELEASE
- MySQL Database
3. Database Schema
Find the table structure of the MySQL database used in this example.
CREATE TABLE `country_master` (
  `country_id` int(4) AUTO_INCREMENT,
  `country_name` varchar(20),
  `country_lang` varchar(10),
  `country_population` int(5),
  PRIMARY KEY (`country_id`)
);
4. Dependencies Required
Building a Spring Boot RESTful CRUD application, you need the following dependencies.
<dependencies>
<!-- Spring boot data -->
<dependency>
<groupId>org.springframework.boot</groupId>
<artifactId>spring-boot-starter-data-jpa</artifactId>
</dependency>
<!-- spring boot web -->
<dependency>
<groupId>org.springframework.boot</groupId>
<artifactId>spring-boot-starter-web</artifactId>
</dependency>
<!-- MySQL database connector -->
<dependency>
<groupId>mysql</groupId>
<artifactId>mysql-connector-java</artifactId>
<scope>runtime</scope>
</dependency>
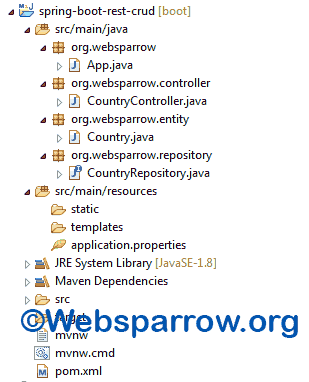
</dependencies>5. Project Structure
Final project structure of our application in STS ide will look like as follows.
6. application.properties
Configure datasource, JPA properties, etc in application.properties file. These properties automatically read by Spring Boot.
# MySQL database connecting strings
spring.datasource.url=jdbc:mysql://localhost:3306/websparrow
spring.datasource.username=root
spring.datasource.password=

# JPA property settings
spring.jpa.hibernate.ddl-auto=update
spring.jpa.properties.hibernate.show_sql=true
7. Create the Entity
Create a Country model class, define its attributes and annotate with @Enitity and @Table annotation at the top of the class. @Table annotation is used to map your existing database table with this class and @Column annotation map table columns.
Note: If the table is not available in your database,
@Entityannotation tells Hibernate to make a table out of this class.
package org.websparrow.entity;

import javax.persistence.Column;
import javax.persistence.Entity;
import javax.persistence.GeneratedValue;
import javax.persistence.Id;
import javax.persistence.Table;

@Entity
@Table(name = "country_master")
public class Country {

	// TODO: Generate getters and setters...

	@Id
	@GeneratedValue(strategy=GenerationType.AUTO)
	@Column(name = "country_id")
	private int countryId;

	@Column(name = "country_name")
	private String countryName;

	@Column(name = "country_lang")
	private String countryLang;

	@Column(name = "country_population")
	private int countryPopulation;

}
8. Create the Repository
Create a CountryRepository interface which extends CrudRepository. This will be AUTO IMPLEMENTED by Spring into a Bean called countryRepository.
package org.websparrow.repository;

import org.springframework.data.repository.CrudRepository;
import org.websparrow.entity.Country;

public interface CountryRepository extends CrudRepository<Country, Integer> {

}
9. Create the Controller
Create CountryController class which handles the user request to perform create, read, update, and delete operation. Learn more about @RestController and @Autowired annotation.
package org.websparrow.controller;

import java.util.Optional;

import org.springframework.beans.factory.annotation.Autowired;
import org.springframework.web.bind.annotation.DeleteMapping;
import org.springframework.web.bind.annotation.GetMapping;
import org.springframework.web.bind.annotation.PathVariable;
import org.springframework.web.bind.annotation.PostMapping;
import org.springframework.web.bind.annotation.PutMapping;
import org.springframework.web.bind.annotation.RequestBody;
import org.springframework.web.bind.annotation.RequestMapping;
import org.springframework.web.bind.annotation.RestController;
import org.websparrow.entity.Country;
import org.websparrow.repository.CountryRepository;

@RestController
@RequestMapping("/country")
public class CountryController {

	@Autowired
	CountryRepository countryRepository;

	// insert new country into database
	@PostMapping("/add")
	public Country addCountry(@RequestBody Country country) {

		return countryRepository.save(country);
	}

	// fetch all country list from database
	@GetMapping("/all")
	public Iterable<Country> allCountry() {

		return countryRepository.findAll();
	}

	// fetch specific country by their ID
	@GetMapping("/{countryId}")
	public Optional<Country> countryById(@PathVariable("countryId") int countryId) {

		return countryRepository.findById(countryId);
	}

	// update existing country
	@PutMapping("/update")
	public Country updateCountry(@RequestBody Country country) {

		return countryRepository.save(country);
	}

	// delete country from database
	@DeleteMapping("/{countryId}")
	public void deleteCountry(@PathVariable("countryId") int countryId) {

		countryRepository.deleteById(countryId);
	}
}
10. Make the application executable
Create an App class and run it.
package org.websparrow;

import org.springframework.boot.SpringApplication;
import org.springframework.boot.autoconfigure.SpringBootApplication;

@SpringBootApplication
public class App {

	public static void main(String[] args) {
		SpringApplication.run(App.class, args);
	}
}
11. Test the application
Now everything is done. Let’s test the application. To test the application open the Postman and follow the below steps:
1. To add a new country use the http://localhost:8080/country/add URL, select the POST method, set Content-Type="application/json" in the Headers tab, select raw in Body tab and paste the following code.
{
"countryName": "India",
"countryLang": "Hindi",
"countryPopulation": 400000
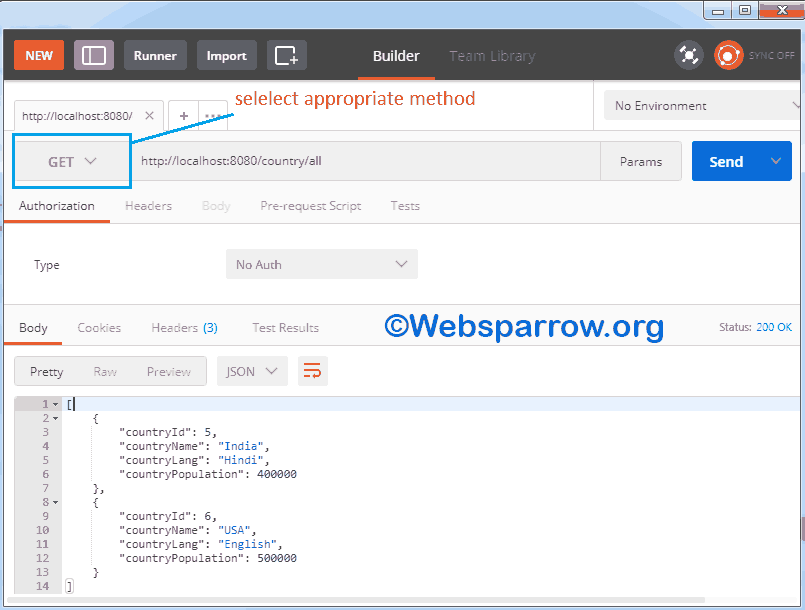
}2. To fetch all country list use the http://localhost:8080/country/all URL with GET request.
3. Similarly, you can perform the update and delete operation. For update, use PUT and delete use DELETE request.
Download Source Code: spring-boot-restful-crud-example-with-mysql-database.zip
References
- Accessing data with MySQL
- Spring Boot RESTful Web Service with JPA and MySQL
- Interface CrudRepository<T,ID>